Wednesday, November 20, 2013

Thanksgiving Table Planning

I wanted to pop in quickly today and share my Thanksgiving table planning! This year I'm going for a yellow and green color scheme mixed with natural materials and metallics. I love how it's coming together so far. I made the table runner and will be back with a tutorial next week. 


Tuesday, November 12, 2013

My New Deer


I wanted to pop in today to share my newest find that I am so, so in love with. I have been obsessed with faux taxidermy after seeing it all over Pinterest and on some of my favorite blogs. Here are some of my favorites:


Unfortunately, I did not want to drop $100+ on one and so pretty much gave up. However, enter my favorite place ever - Target - and I finally got lucky!


As I was walking through the store (ahem, grocery shopping), I rounded the corner and found this little beauty, who is part of their holiday line (which is amazing by the way!) I was immediately smitten and it went right into my cart. You can find her online here

While I loved it just the way it was, I wanted to glam it up a little bit and make it more like my inspiration photos. This was a very simple process - I simply taped off rest of his body, leaving only the antlers exposed and went to work with my favorite gold spray paint


Here is the finished product! I love how it turned out and can't wait to dress it up for the upcoming holidays! 


Monday, October 21, 2013

Spooky Chic Halloween Mantel

Today I wanted to share the details of my Halloween Mantel. I love the spooky chic theme and adore how it came out!


I used black, white and shades of metallic to create the color scheme, using mostly things I already had around the house. This kept it within what would otherwise be my style and let me just add a few seasonal touches. This kept the cost down too!


I first added my Halloween Ruffle Wreath, which was really the jumping off point for the entire mantel. 


To create some height, I stacked some books with the pages forward and placed my favorite Nate Berkus chevron urn on top. I topped it a little crow from the Dollar Tree and leaned a brass key against it. The candle holder was a cheap glass one from Goodwill that I sprayed with Looking Glass paint to give it a mercury glass look. 


For the other side, I also stacked books backwards, except for the Wicked book, which I left forwards since it is Halloween appropriate. I then painted branches from my yard with black spray paint and sprinkled them with silver glitter for a little bit of shine. Those were put in a silver and gold flecked vase, also from Goodwill. The hourglass is a vintage piece that belonged to my father. The real pumpkins were spray painted with chalkboard paint and their stems painted with liquid gold leaf. I can't draw to save my life so my B looks a little funky, but I'm ok with that! 


The large brass bucket is always on my hearth, used to store magazines and extra blankets. I put in my black and white striped blanket from Ikea and added some white pumpkins with gold leaf stems. 

This was a very inexpensive display to create - my only costs were the pumpkins and a $1 for the little crow. I love using what I already have to decorate for the holidays. Happy Halloween! 


Monday, October 14, 2013

Spooky Chic Halloween Coffee Filter Wreath


Happy October everyone! As Halloween approaches, I changed up my coffee filter wreath to give it a little bit of spooky flair. The best thing about this wreath is I can use it for every season just by switching up the decor. 


A little glitter skull and some black and white ribbon was all it took. While I love Halloween, I'm not into the gory decor...I decided my theme for this year's decorating was going to be "spooky chic" and I think this fits the bill perfectly! It is hanging on my mantel, which I just finished. I will share the whole thing soon! 


Monday, September 30, 2013

Thrifty Weekend

Though I haven't shared much here, thrifting is one of my favorite things to do. Estate sales, Goodwill, Yard sales, I love them all. However, probably my favorite source for vintage and unique finds is the flea market. We are lucky that we have it once a month here in Nashville, and this weekend was the perfect weather for it! 


One of the first things I spotted was this gorgeous vintage typewriter. I thought it would look great to style a shelf in an office space. 


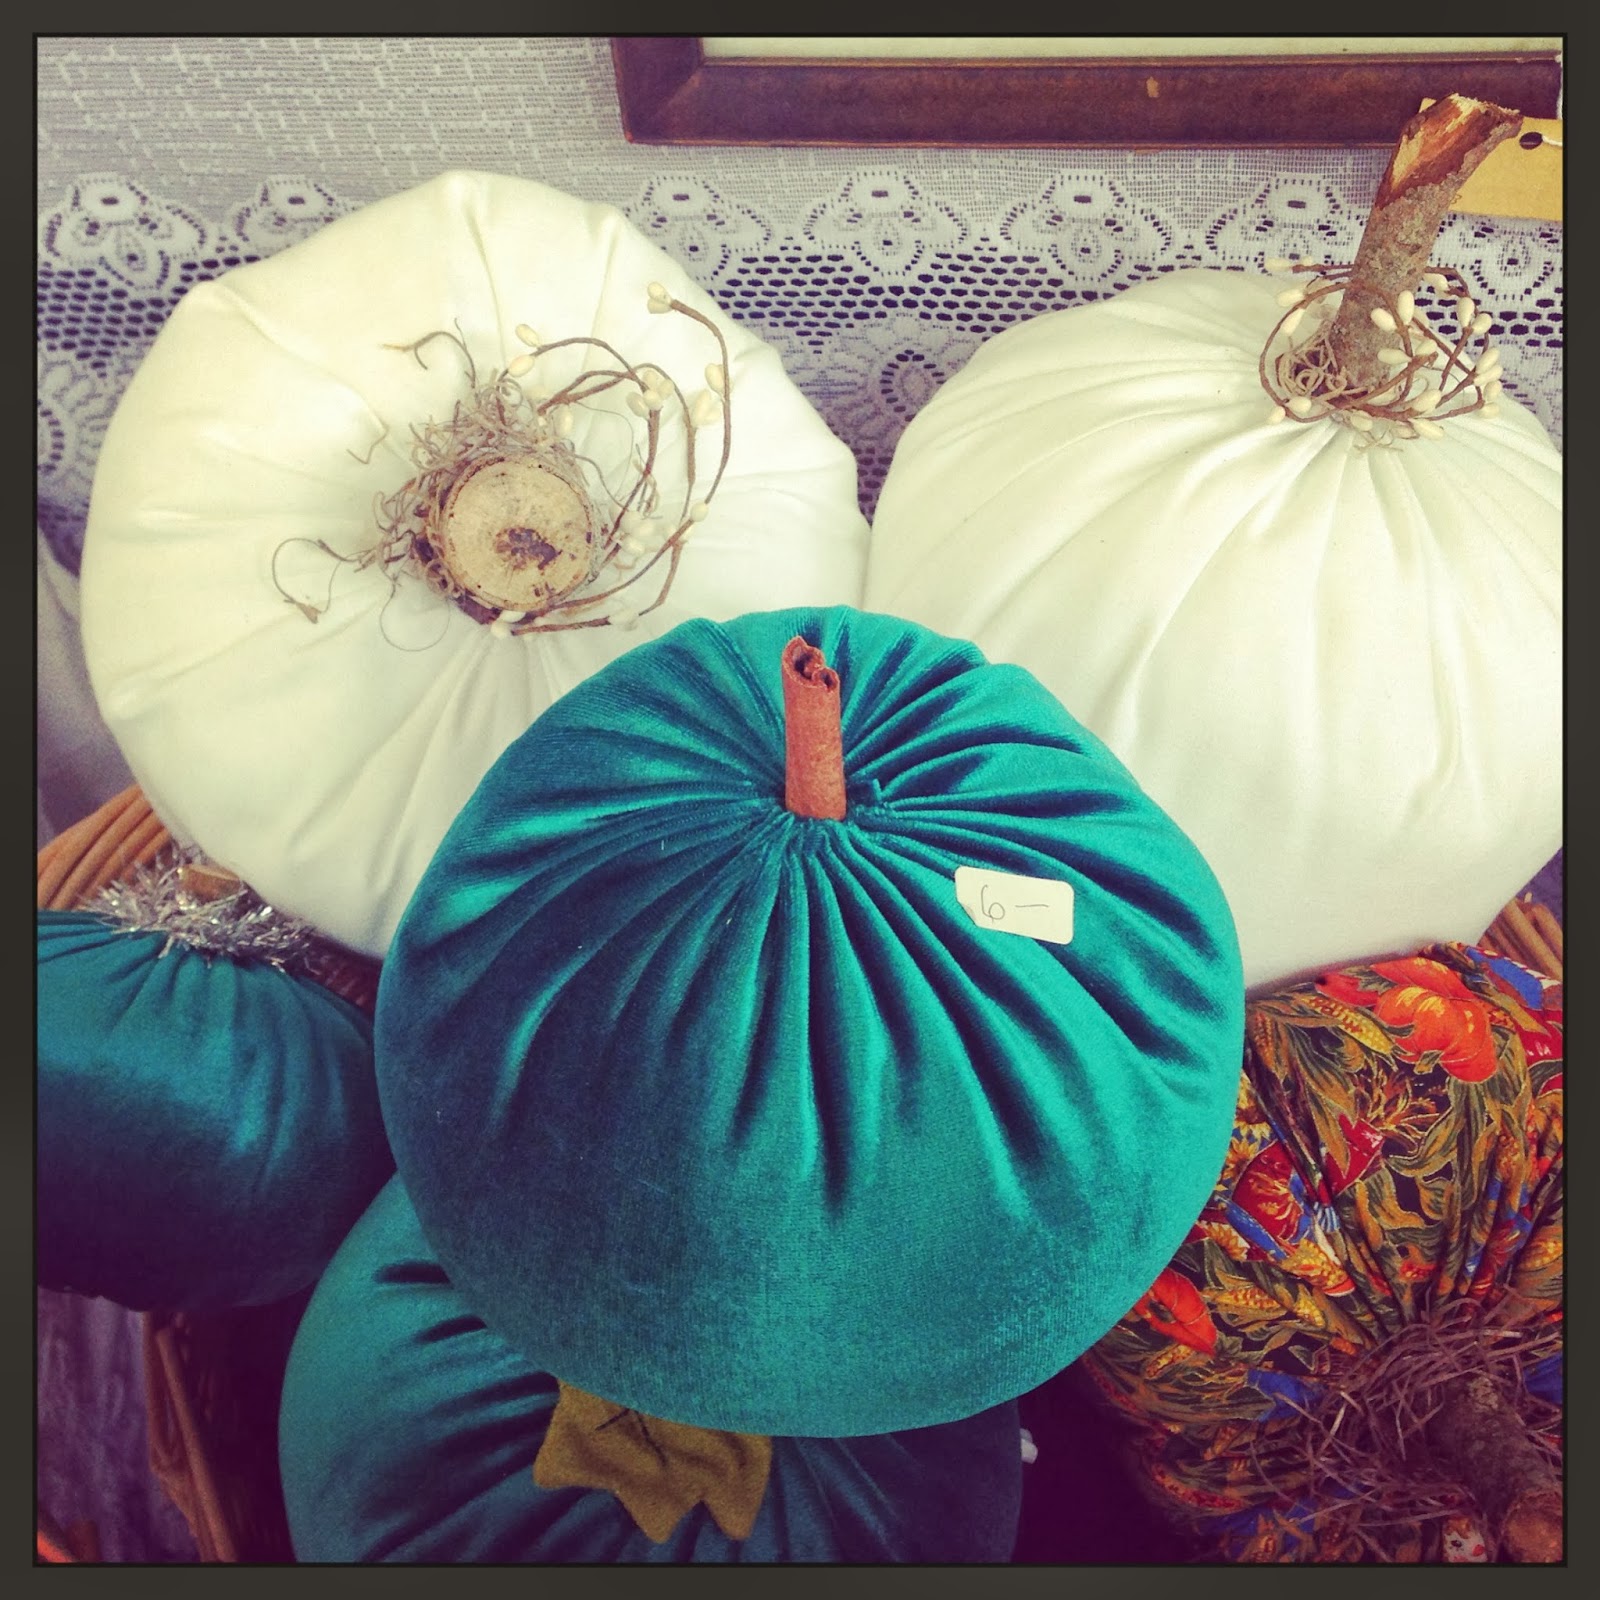
In the spirit of the season, I was also loving these fabric pumpkins. How gorgeous is that green velvet? I smell a DIY project! 


There is no shortage of burlap sacks at our flea market, but I loved the unique colors of this one. I think it'd look fantastic framed for a kitchen or even covering bar stools. In fact, I am kind of regretting not scooping it up! If it is still there next month, it'll definitely be mine! 


Vintage Christmas ornament heaven! I actually took some of these home, though I wish I could have taken the whole box!


How unique is this coffee table? The seller uses old piano keys in coffee tables and tops with glass. 


Something about this sofa just spoke to me. The shape is fantastic, and I can just see it in a boutique with bright throw pillows on it. 


Here are some of the vintage ornaments I took home with me, along with a Mercury Glass tree. Is it Christmas yet?! 


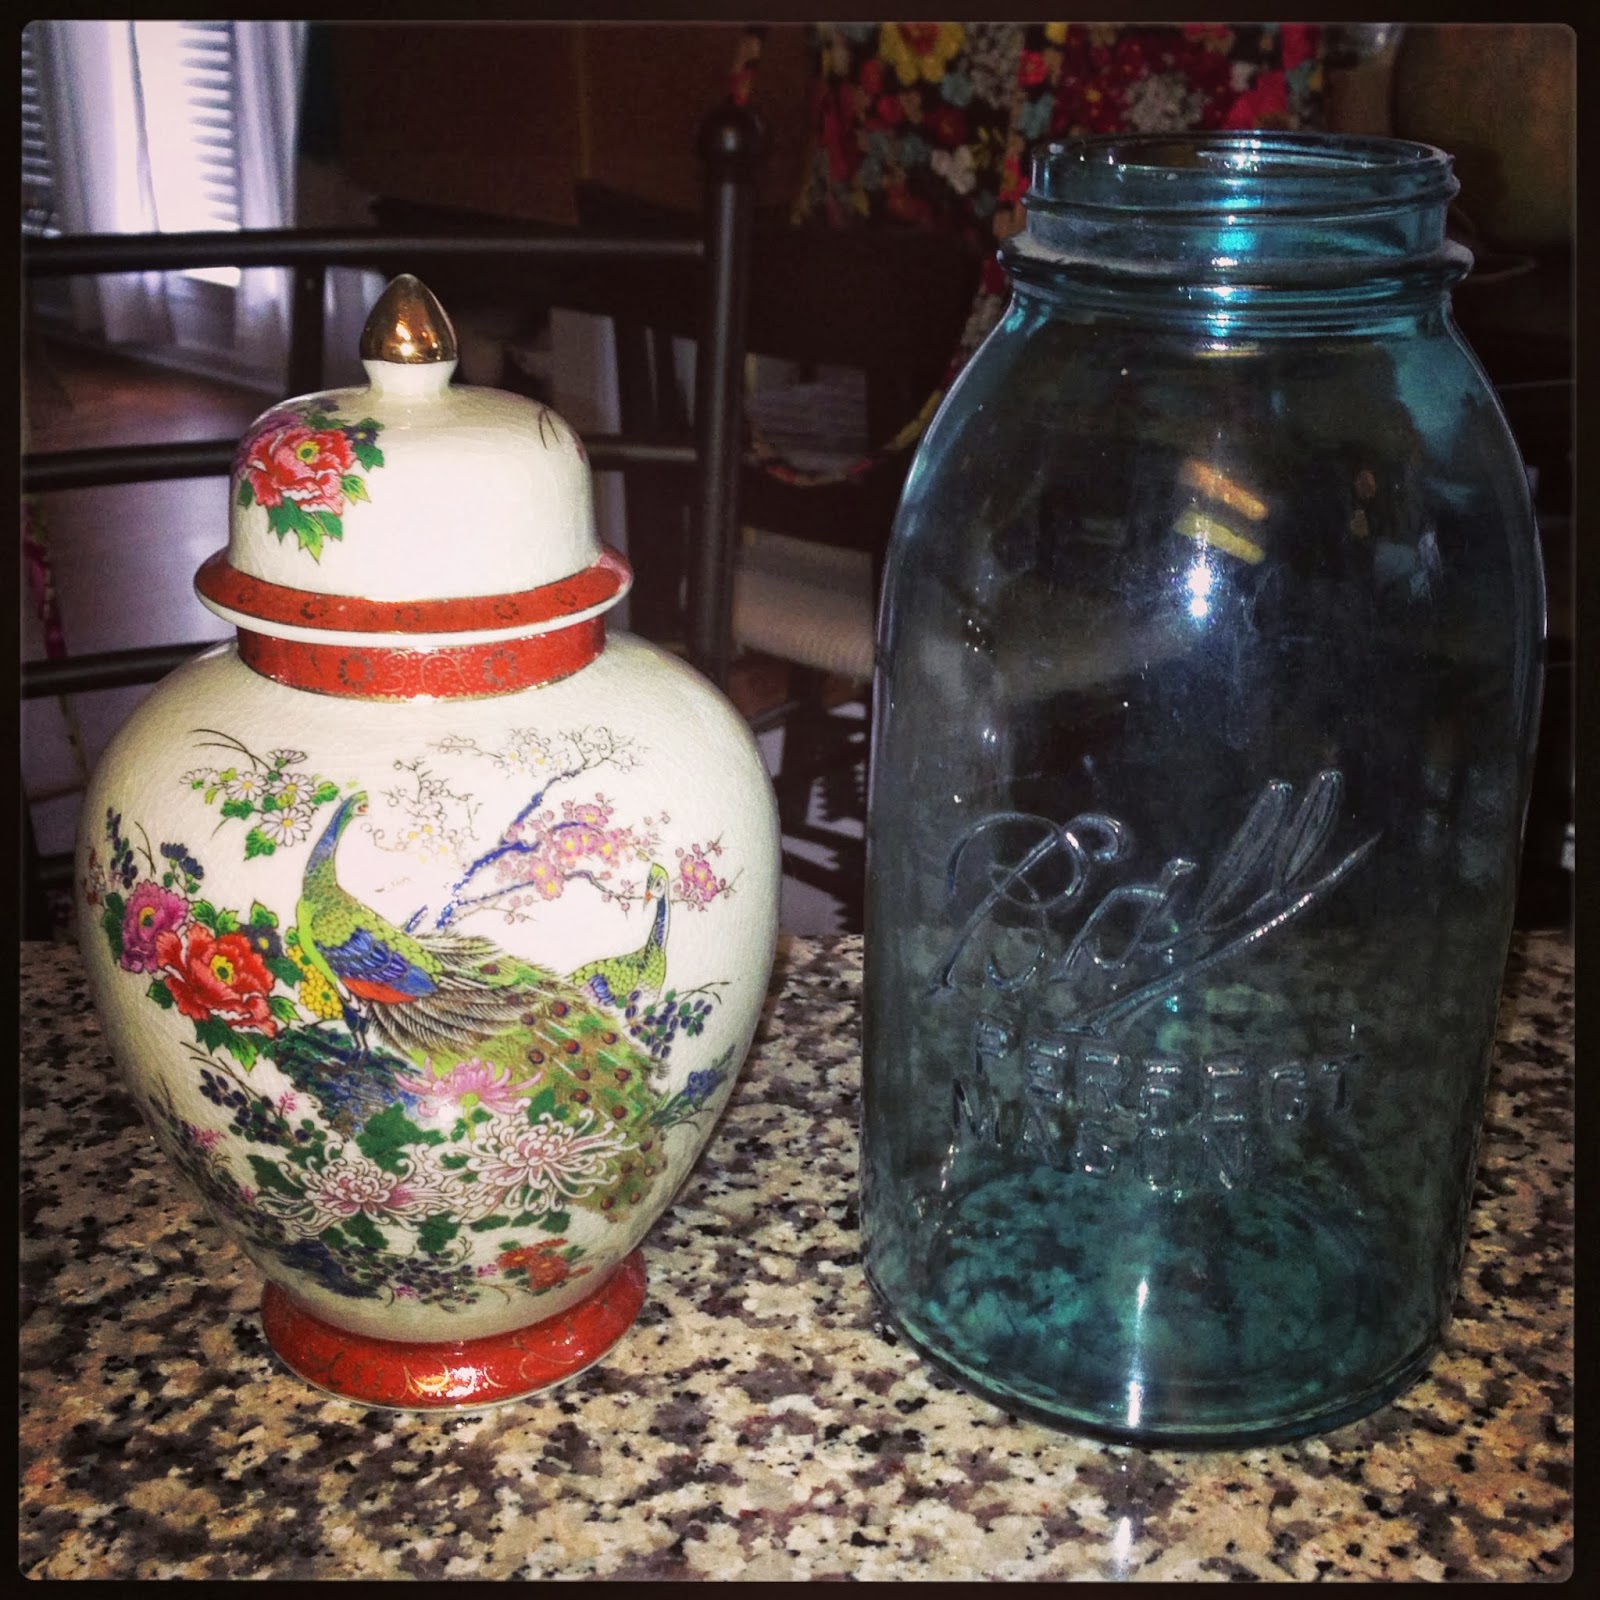
I love ginger jars and peacocks, so the find on the right was an easy choice. I also scooped up a large blue Ball jar. 


I also walked away with this gorgeous landscape on canvas. Only $8?! I couldn't pay the man fast enough. The canvas is a bit beat up, but once I got it home in a matted frame, it looks fantastic. 


Do you like going to flea markets? Have you found any gems lately? 

Thursday, September 26, 2013

Fall "Mantel"

Today I wanted to share how I brought a little bit of the Fall season into my house. It is certainly not quite here in Nashville yet, though we have had a few cool nights. Of course I'm always ready for it to hit as soon as possible...I'm a start eating pumpkin in July kind of girl :) 

While I do have an actual mantel, it has a big honking tv over it. I wish I could put it somewhere else, but unfortunately that's the only place for it. I won't let that stop me from decorating though, so I set to snazzing up the top of my new turquoise cabinet. 


I started by grabbing an old wine box that I recently picked up at a yard sale. I loaded in some of my favorite things about fall - cinnamon sticks, pumpkins, candles and chestnuts. Next I added some mason jars with candles. I had the ceramic leaf plate but hated the color, so did what I do with everything - added a touch of gold. After that I added some pretty yellow blooms and I was on my way! 


I picked up this cute little rattan pear at Goodwill. I have a large collection of milk glass and love how it looks here with the glass dome on top. I got into my scrabble game to add a little touch of the south ;) This super simple idea will translate into any season or holiday, and is one I know I'll be using a lot more. 


I am linking up over at the Fall Mantel link party over at Thrifty Decor Chick! So looking forward to checking out all the gorgeous inspiration there. 


Wednesday, September 11, 2013

{DIY} Fall Coffee Filter Wreath


Today I whipped up a cute little fall project. The coffee filter wreath has been done all over blog land, and for good reason - it's very simple to do and very inexpensive. In fact, mine was actually free as I had the supplies on hand already. 

Using Lil Luna's tutorial, I started by making my wreath. This was a very simple process - just keep on gluing those filters! Mine looked a little strange when I first started and to be honest I couldn't "see it", but by the time I was finished it came together beautifully. 

Once the wreath was complete, I set to making it themed for Fall. I started by printing out a dictionary page of small text with a vintage theme. I love The Graphics Fairy for these types of projects. Once that was printed, I stuck it back in my printer, typed up the word Fall in my word processing program, and printed it back on top of the dictionary page. 


After that, I simply cut out my letters in a pennant triangle shape and glued on top of scrap fabric left over from my headboard, cut slightly larger than the letters. I then glued the back to twine to make it into a banner and placed over my wreath. A mini pumpkin cut off a floral pic and it was ready! 


I am pinning tons of fabulous Fall inspiration on my Pinterest page, would love for you to check it out and get inspired! Have you made any seasonal projects so far this year? 

Thursday, August 15, 2013

Stylish Substitute: Suzani Throw Pillow

I have a great Stylish Substitute for you today. I have been in love with this blue and white suzani print for quite a while. In fact, it inspired my living room makeover!


$65 at Dwell Studio


$44.99 at Kohls - use promo code LUVTOSHOP for 25% off, making this one only $33.75.


That's almost half the price ya'll. My kind of deal! 
And talk about a dead ringer!


Monday, August 12, 2013

{DIY} Watercolor Love

Lately I have been so inspired by all of the watercolor motifs that are popping up on products all over the place. There is something so calming and ethereal about them that I just love. 

I decided to paint some of my own to display in my home. The best thing about this type of "art" - you can't mess it up! I just used cardstock and regular watercolor paints. Made me feel like a kid again :)


Here they are framed and hanging in my kitchen. The perfect pop of color for not a lot of cash or time. Sometimes little projects like these turn out to be my favorites! 


Friday, August 9, 2013

Stylish Substitute: Greek Key Bedding

One of my favorite classic patterns is greek key. I don't think it will ever go "out", and as such, I have several things around my house with this motif. Today is one of my favorite Stylish Substitutes - I have the "save" on my bed currently! 

Splurge: 


$557 for Queen Duvet and Two Shams


Save:
$65.99 for Queen Duvet and Two Shams

That's a $491 savings! Can't beat that for classic bedding. Have you found any good saves lately?


Wednesday, August 7, 2013

Currently Coveting...

Let's go virtual shopping, shall we? I'm currently wishing hard for any or all of these items to suddenly appear in my home!


1. 2. 3. 4. 5.


Tuesday, August 6, 2013

Chippendale Chair Chair Score!

Has there ever been a thrifted/vintage item you just had to have? I'm talking stalk Craigslist every day, frequent goodwill and thrift stores, and show up early for every estate sale? This is how I felt about Chippendale Chairs. 


After diligently stalking for 4 months, I FINALLY saw them waiting for me at a weekend estate sale. I dragged my mom and partner in thrifting out of the house at 6 am to make sure we would be first in line, and after scaring some other people off (no, but really) I scored! 


Four of these came home with me and are currently undergoing a makeover for my dining room. I can't wait to share the finished product. I am planning to spray them glossy white and am still debating the upholstery - teal velvetBlack and white stripes? Solid black vinyl? We'll see :)


I also snapped up two of these, though I can't say I needed them. Perhaps they will become side chairs in my living room. They remind me a little bit of the Italia Chairs from Horchow.

I'm so happy to finally have these home and in the garage for some paint and upholstery. I'd love to hear your holy grail thrift item! 

Monday, August 5, 2013

French Bull for Target

Have you seen the new small kitchen appliance release at Target? They have partnered with Jarden Consumer Solutions to release a line under the lifestyle brand French Bull. Think bright colors, chevron patterns and a whole lot of fun! I am in LOVE with how fun these are and seriously considering breaking my current crock pot to make room for this beauty ;)


Friday, August 2, 2013

My life via Instagram

Watermelon Agua Fresca. The largest rose ever. Cute pencils from Target Dollar Spot.  

Ikea Lappljung Rug gracing my dining room. Vintage Grand Ole Opry Hatch Show Print found at the flea market. Delicious seafood smorgasbord. 

Recent trip to Gatlinburg, TN. Fresh baked rosemary bread. Accessories via Kate Spade, J. Crew and Target.

Thursday, August 1, 2013

{DIY} Instagram Collage

It's no secret that I love Instagram. I love being able to easily and quickly document the little happy moments that make me smile every day. I noticed that with as many pictures as I take every week, it had been forever since I'd updated any in the frames in my home. After being inspired by all of the Instagram collages and gallery walls on Pinterest, I decided it was past time for me to create a project using my Instagram photos. However, after being shocked at how expensive and difficult it is to find a large collage frame with 4x4 openings (the standard print size), I decided I'd make my own. 


Supplies needed:

Old frame
Poster board
Instagram prints
Scissors and tape

I started with this very sad $6.99 frame from Goodwill that had been sitting in my garage for months. I am in love with any and everything faux bamboo, and knew when I bought it that I'd eventually think of the perfect use for it. You're cute pup, but it was time for you to go.    


This frame is approximately 24x30, but any size frame will do depending on how many pictures you want to use. This one had obviously seen better days, so the frame itself got a quick coat of metallic spray paint to bring it back to life. I then went through my Instagram feed and picked out my favorites. I used Walgreens to print the photos - you can do it right from their phone app, making it super fast and easy to get your prints. 

Then pop out your current frame insert, cut the poster board to the same size and arrange your prints until you like how they look. There is really no method to this, but I wanted the poster board to appear as if it was a matting for the prints, so I made sure to space them evenly on all sides. I had a kitten helper in this process, admiring his photo. 


See how it looks like they are matted in a fancy, expensive frame with 4x4 openings? That's what we're going for! After I arranged them how I liked, I simply taped them in place and popped it back in the frame. 


I am loving how custom the finished project is, and better yet, how much money I saved over buying a new frame. 

I'd love for you to follow me on Instagram - it won't be long before it'll be time for another one of these!